
Laptop cover refurbishing is a huge market in the world. Not only because of its competitive price, but also a great support to recycle damaged PC and reduce electric wastes. In this tutorial we will provide step by step guidance how to remake a laptop panel to its original condition.
Before we start anything, we need to prepare some necessary tools which we will use in the process like the following:
Abrasive paper(800-1200 mesh), cotton cloth, cleaning agent, paint, face mask, tape & gloves
Pre-treatment
The first step is to clean up the panel to make sure it’s dust and grease free so we can move to the next step with no problem. In order to make the panel clean enough we need to use a cloth with cleaning agent such as solvent or alcohol to wipe it carefully. Depends the actual panel condition, we might use dip-in method for complete cleaning. After cleaning treatment, we need to dry up on a rack or probably in an oven if it’s a mass operation.
The second process is sanding via abrasive paper. The purpose is to remove old pait in order to apply new. It’s a necessary process in order to improve the paint contact with panel as well as the surface flatness. This process should be handled softely to avoid scratches on substrate. If the panel is metal production, we might also use “blasting” which is quick and safe way.
After sanding or blasting, we need to wipe the panel again to make sure it’s clean enough in order to apply painting.
Spray Painting
Mostly we need to use a tape mask the areas that do not need painting. Such as trackpad & fan area etc. After masked properly we can put the panel to a painting station (with good ventilation or the best to have a paint booth)
According to the paint we use, we need to mix it properly with thinner and hardener by required ratio and color pigment. Especially when we want to recover the original painting color, this process is crucial and it requires some kind of formula calculation.
Once done, we need to wear a mask and trigger spray gun to spray painting on the surface. The spraying should be done on flat surface first then edges. Spraying distance should be 10-15CM according to spray gun atomizing and spraying size. If it’s a multi coating operation such as primer /color /varnish, mostly we need to bake it after each spray operation. The drying process has to be properly handled as it’s essential for final finishing. Temperature and duration must strictly follow paint documentation and UV ove will be required if it’s uv base paint
NOTE: After primer or color stage, we need to inspect the paint layer flatness. If there’s wave or dust particles or any other defect phenomenon on the surface we need sanding or rework before moving to next painting process. If we do not fix the issues, it can’t be solved after varnish painting as all problems covered from down side.
Above is the process to refurbish a laptop panel via painting. If we need to repaint keyboard as well, we might use printing or laser for the keyboard words depends the needed results.
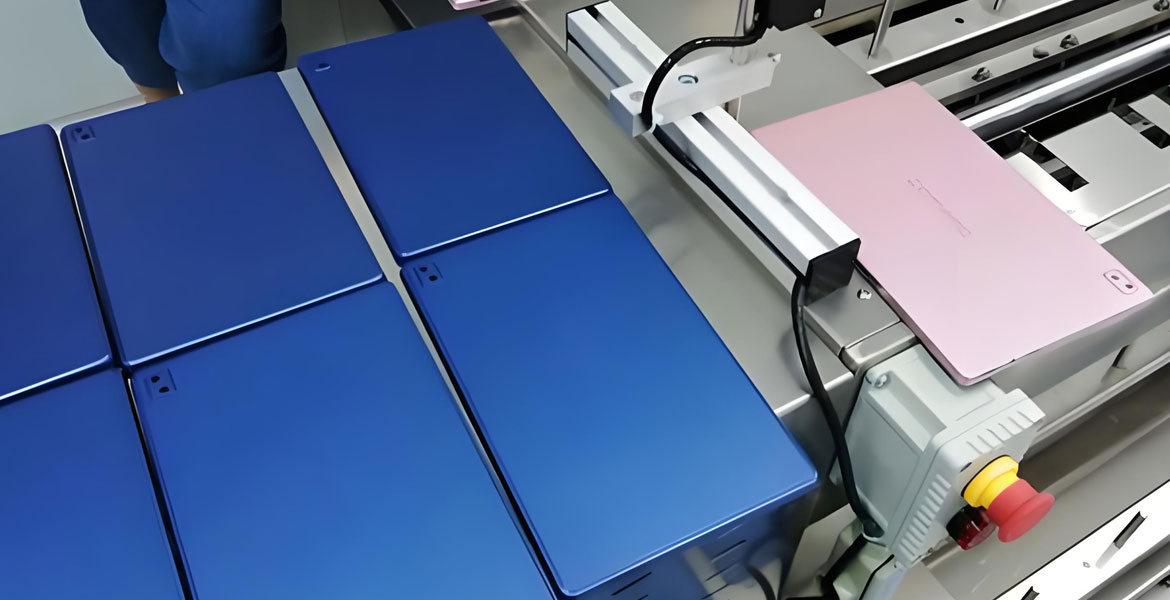
If we’re running a refurbishing business and there are big quantity panels to work with. We highly suggest to handle the painting process automatically via our laptop painting machine. Not to mention the health protection for operator, it’s also great improvement for quality control. Just a single program and it’s always working the same way.


