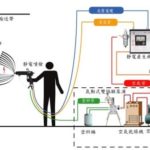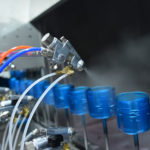
Spray gun is the most important component for high quality spray painting. Thus its crucial to maintain it correctly and do quick fix when encountering outages. Here we provide a quick guidance on how to apply spray gun maintenance and some quick fixes to some common phenomenons.
Spray gun maintenance and problem fix
If spray gun is not cleaned immediately after use, the nozzle will be partially or completely blocked. Result is causing spray gun to spray dry paint fragments or paint atomizing in wrong way. It is especially true for enamel with additives. Because if not cleaned immediately after use, the enamel will harden inside spray gun.
Spray gun maintenance guides
It is best to lubricate spray gun parts after work every day. Seals, springs, needles and nozzles must be replaced periodically due to normal wear and aging. Replacement should be carried out according to the manufacturer’s instructions.
Excessive lubricant can flow into the paint and oil passages, so be careful when lubricating, lubricant and paint mix will reduce painting quality. Do not put the entire spray gun in cleaning agent for long time, it will break seal and
destroy the lubrication effect. In order to obtain the best painting effect, different spray guns should used for different coatings and situations.
Under production mode, normally we need to prepare four spray guns, one for primer and medium coating; one for top coat and varnish layer; one for silver paint spray; and one for repairing spray. If these spray guns are well maintained
and cleaned at work order, we will save a lot of time for adjustment and cleaning when changing guns.
Suggested spray gun configuration
1- Air pressure: traditional spray gun is 4.0 bar, HVLP spray gun is 2.0 bar.
2- Spray distance: traditional spray gun is about 18 to 23 cm to object surface, HVLP spray gun is about 13 to 17 cm.
3- Spray pressure
Maximum atomization: air pressure adjustment knob is in the parallel position on spray gun, rotate knob by clockwise to reduce spray air pressure;
Minimum atomization: air pressure adjustment knob is in the vertical position on spray gun, rotate knob by counterclockwise to increase spray air pressure.
4- Paint flow
Increase paint flow: Turn the paint flow adjustment knob by counterclockwise to increase the needle stroke to increase paint flow rate;
Reduce paint flow: Turn the paint flow adjustment knob clockwise to reduce needle travel and reduce paint flow.
5- Adjust the spray width (fan surface)
Increase the spray width: rotate the spray width adjustment knob counterclockwise;
Reduce the spray width: Turn the spray width adjustment knob clockwise.
Paint spray gun is widely used in various industries for painting like furniture, automobiles, doors and windows, machinery and other products. When we use spray gun, we must pay attention to the following situations to keep high work efficiency and protect our spray gun for longer service life.
- Never drop the spray gun in solvent (use a neutral cleaning agent for spray gun cleaning. Cleaning agent pH value should be among 6 to 8)
- Clean in time after using spray gun
- Use original tool to clean spray gun
- Please thoroughly dry after cleaning the spray gun.
- Please place it on the appropriate gun holder after use or cleaning
- Please use original tools to install or uninstall spray gun accessories
- Install or remove spray gun components by correct procedure.
- Do not use the damaged nozzle
- Regularly check or replace spray gun sealer
- Turn the spray adjustment knob with appropriate force
- Use clean compressed air
- Adjust the correct air pressure according to the paint company’s recommendations.
- Use spray quality monitoring kit to check the gun status regularly and test spraying before production.
Spray gun failure solution
Spray gun sometimes encounter some problems in use. Now we will analyze the phenomenon of the spray gun in detail, and analyze the cause according to the phenomenon for a suitable solution.
1- phenomenon: the shape of spray is centered on the side of nozzle
Cause: air cap hole or paint atomizing hole blocked
Solution:
1. clean the atomizing cap
2. replace the atomizing cap
2- phenomenon: paint fan shape on left or right
Cause:
1. the fan shape control hole in air cap is blocked.
2. the air cap is damaged
Solution:
1. clean the atomizing cap
2. replace the atomizing cap
3- phenomenon: the center of the spray is too thick
Cause:
1. the paint viscosity is too high
2. the spraying pressure is too low
3. the spray nozzle diameter increase and needle decrease due to wear.
Solution:
1. reduce the viscosity of the paint
2. increase the spray pressure
3. replace the nozzle set
4- phenomenon: spray splitting
Cause:
1. the paint viscosity is too low
2. the spraying pressure is too high
3. the fan control hole diameter is too large
4. the paint is not enough
5. the atomizing air passage is blocked
Solution:
1. increase the paint viscosity
2. reduce the spray pressure
3. replace the nozzle set
4. add enough paint
5. clean up spray gun
5- Phenomenon: hopping
Cause:
1. the nozzle is not tightly fixed or properly installed.
2. the needle sealer kit is loose
3. spray gun connection nut is loose
4. the paint in the pot is insufficient
5. the nozzle set is damaged
Solution:
1. tighten the nozzle or clean up then reinstall the nozzle set
2. fastening sealer kit
3. tighten the connection nut
4. add more paint
5. replace the nozzle set
6- phenomenon: the spraying upper or lower side is heavy
Cause:
1. There is blockage on nozzle or air cap.
2, the air cap or nozzle is damaged
Solution:
1, cleaning nozzle set
2, replace the nozzle set
7- phenomenon: no paint or a small amount of paint
Cause:
1. spray gun lid is blocked or the air cap and suction tube are blocked.
2, there is no paint in the pot
3, the needle stroke is too small
Solution:
1. clean up air cap and suction tube on the lid of the pot
2, add more paint
3, adjust paint flow


